This guide walks you through the process of setting up authentication for your password protected website so you can define access based on google group assignments.
You'll create a Google Cloud project, enable the Cloud Identity API, create a service account, and set up Google Group restrictions to control access to your secure website. This allows you to have granular control over who can access your secure environment, leveraging your existing Google Group permissions.
Prerequisites
Before you start, ensure that you have:
- Administrative access to the Google Cloud Console and Google Workspace of your school district's Google account.
- The necessary permissions to create projects, enable APIs, generate API keys, and set up service accounts. (this level of access is often restricted to the Technology Director)
Step 1: Create a New Project or Use an Existing One in the Google Cloud Console
- Go to the Google Cloud Console at https://console.cloud.google.com/.
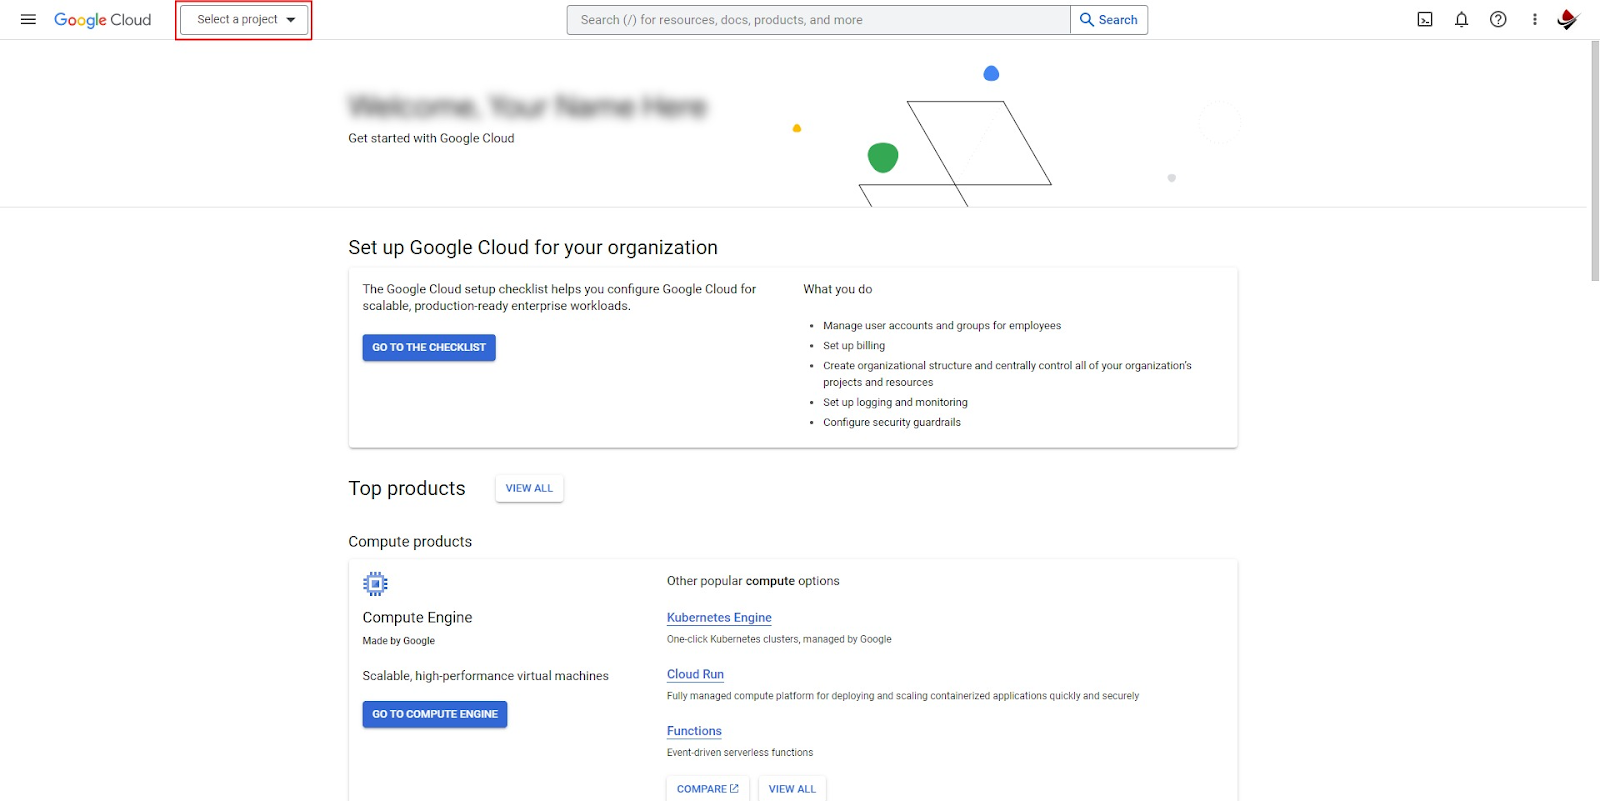
- In the project drop-down, select "New Project."
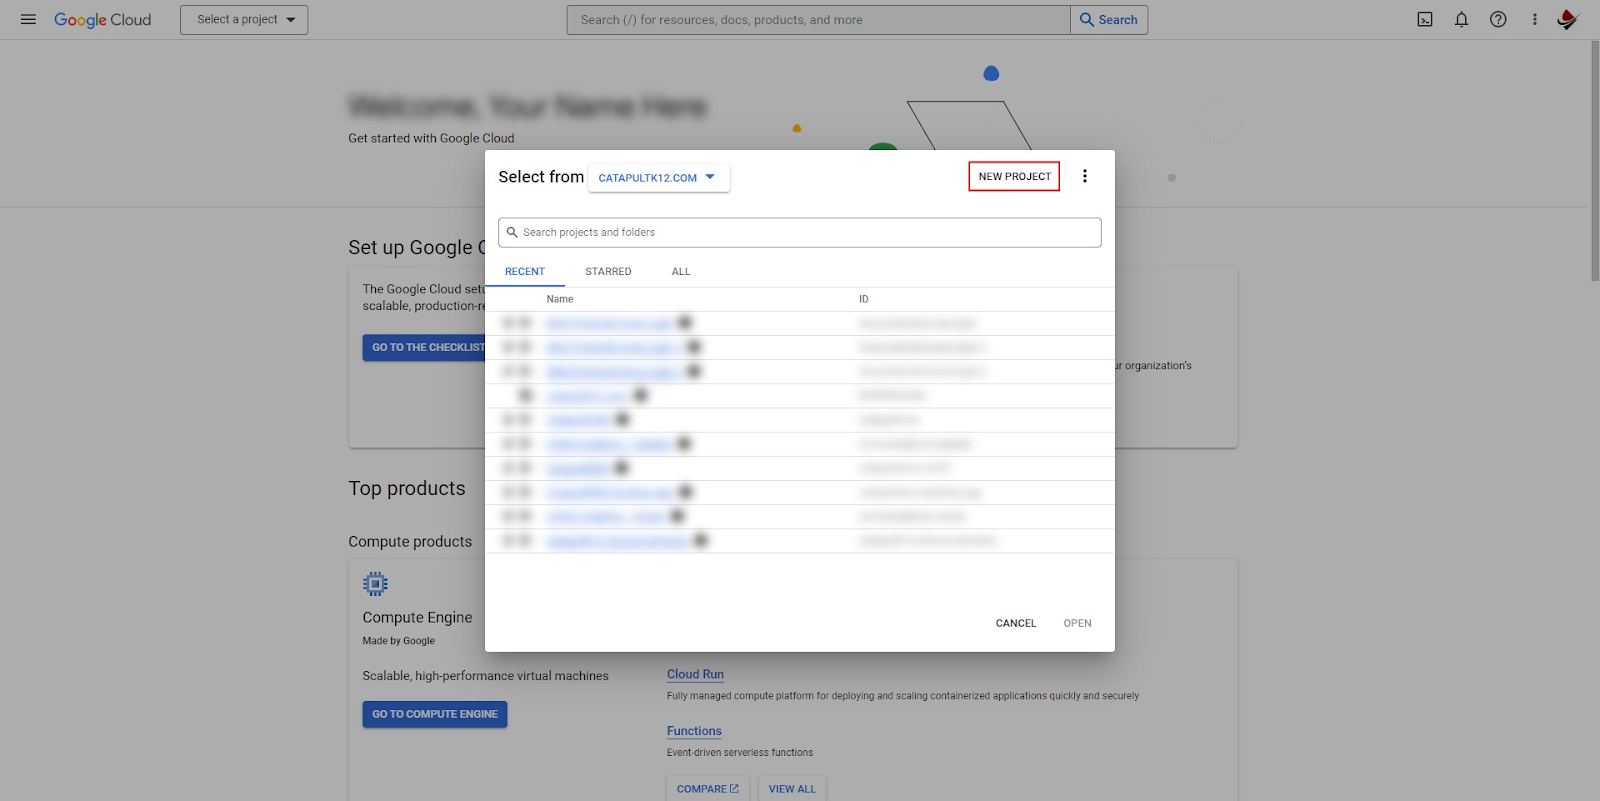
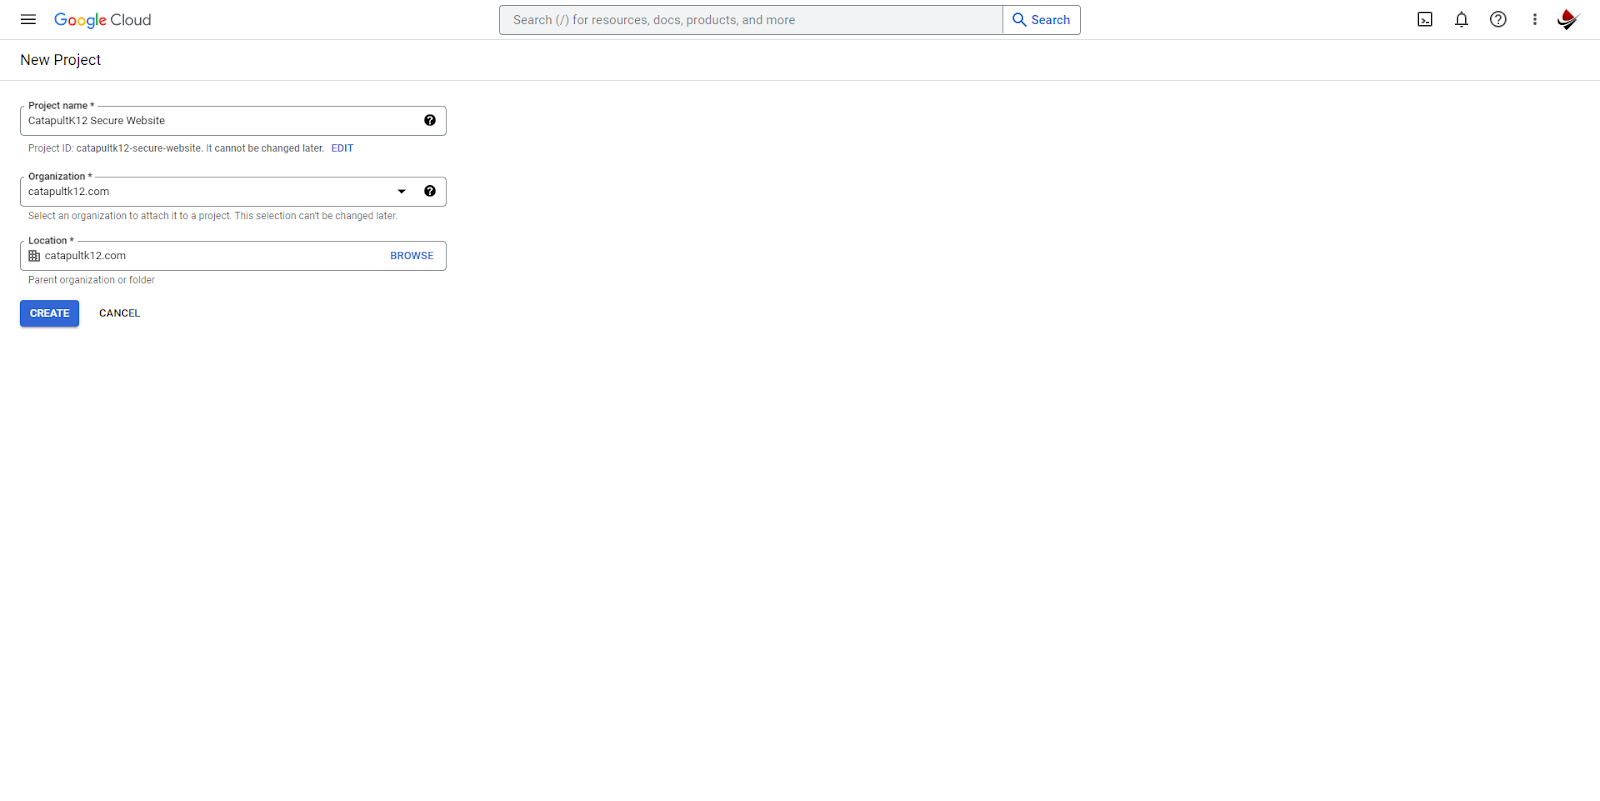
- Enter a project name, like "Catapult Secure Website," and click "Create."
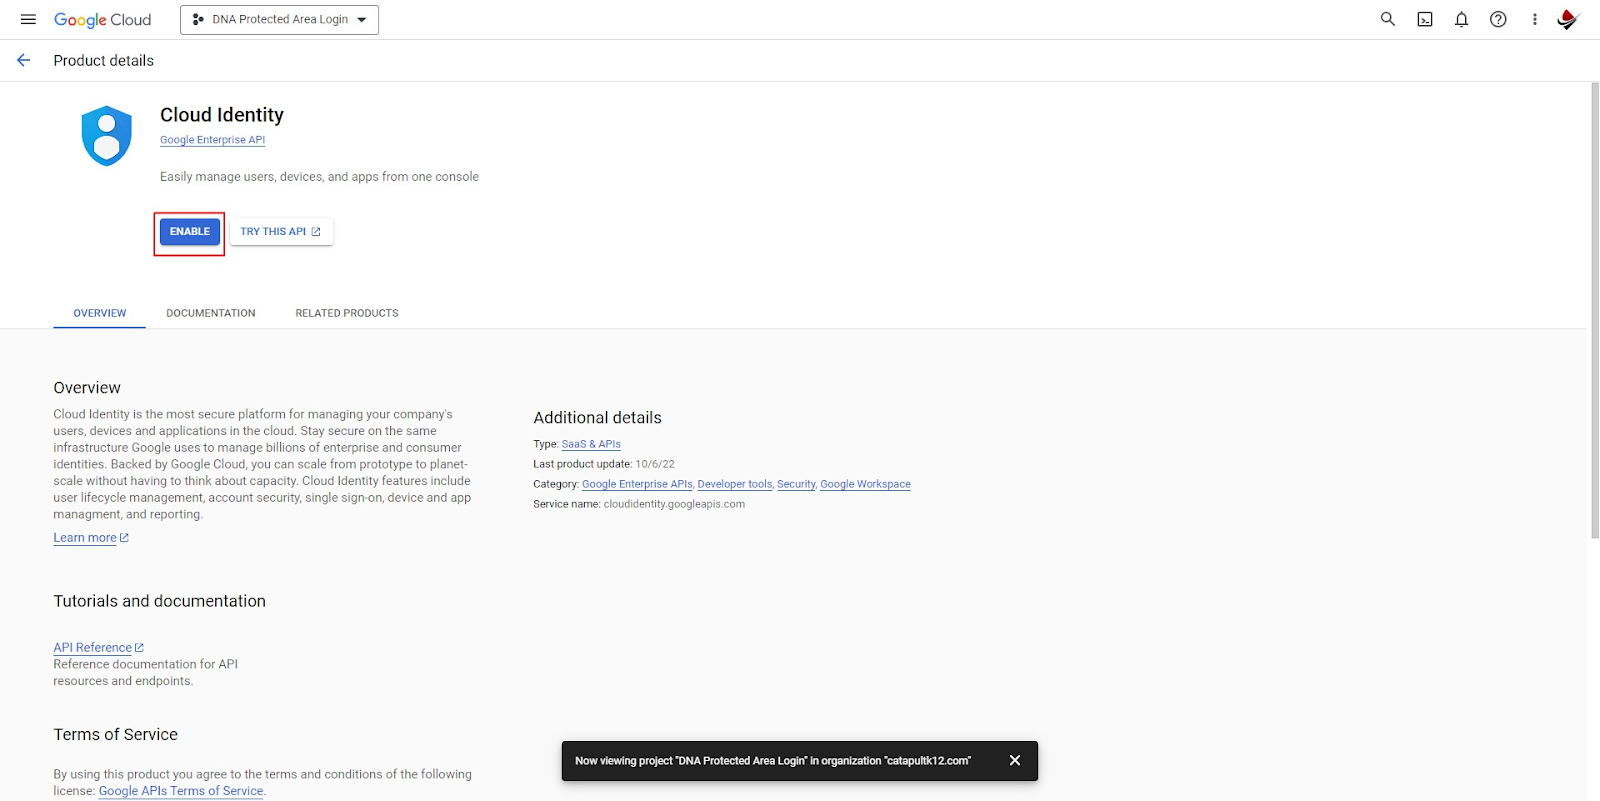
Step 2: Enable the Cloud Identity API
- From your project's dashboard, navigate to "APIs & Services" > "Library."
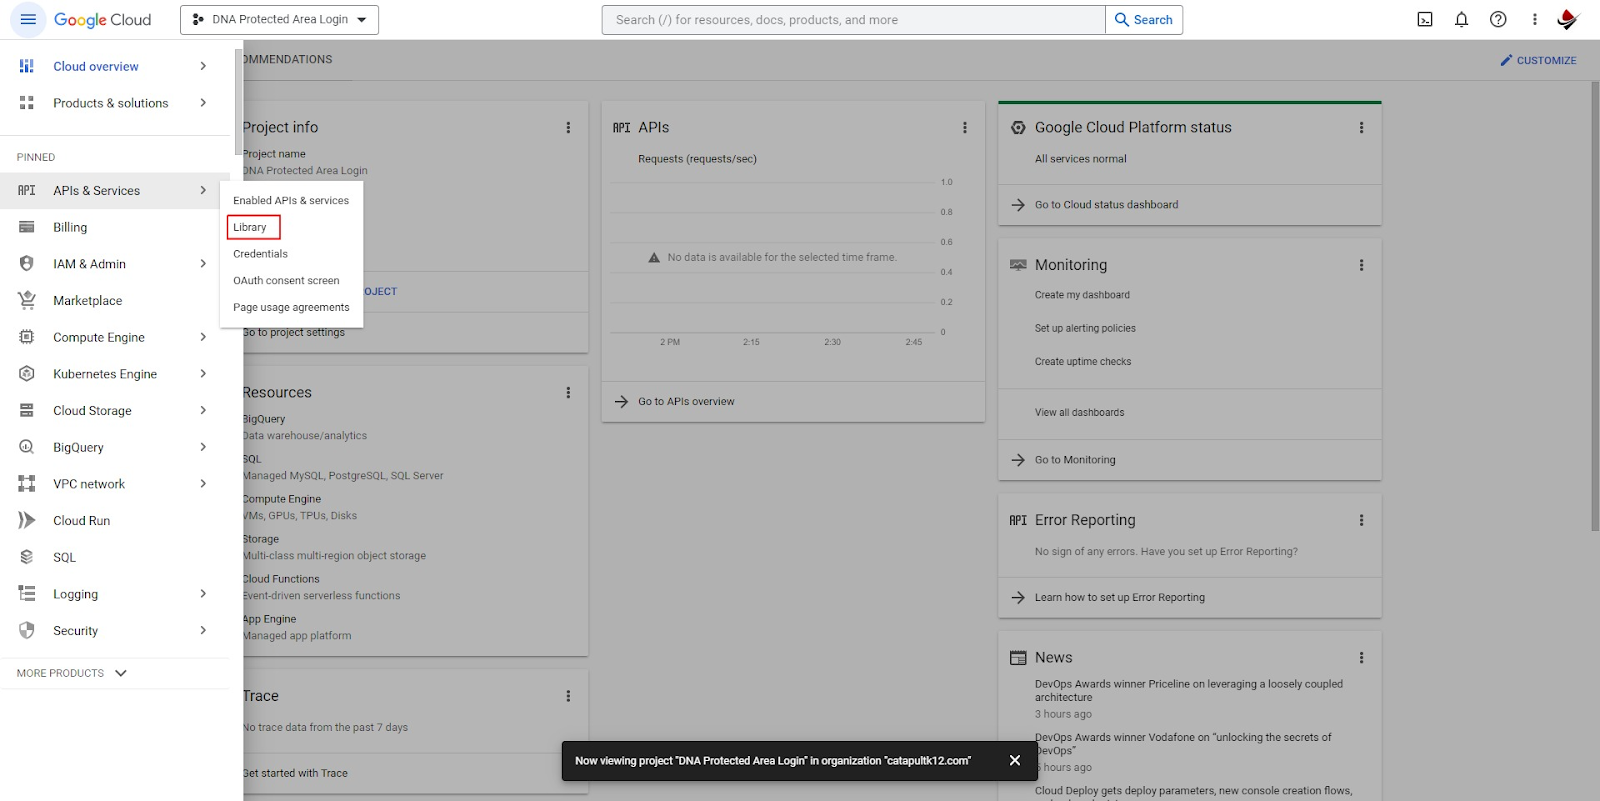
- Search for "Cloud Identity API" and click "Enable."
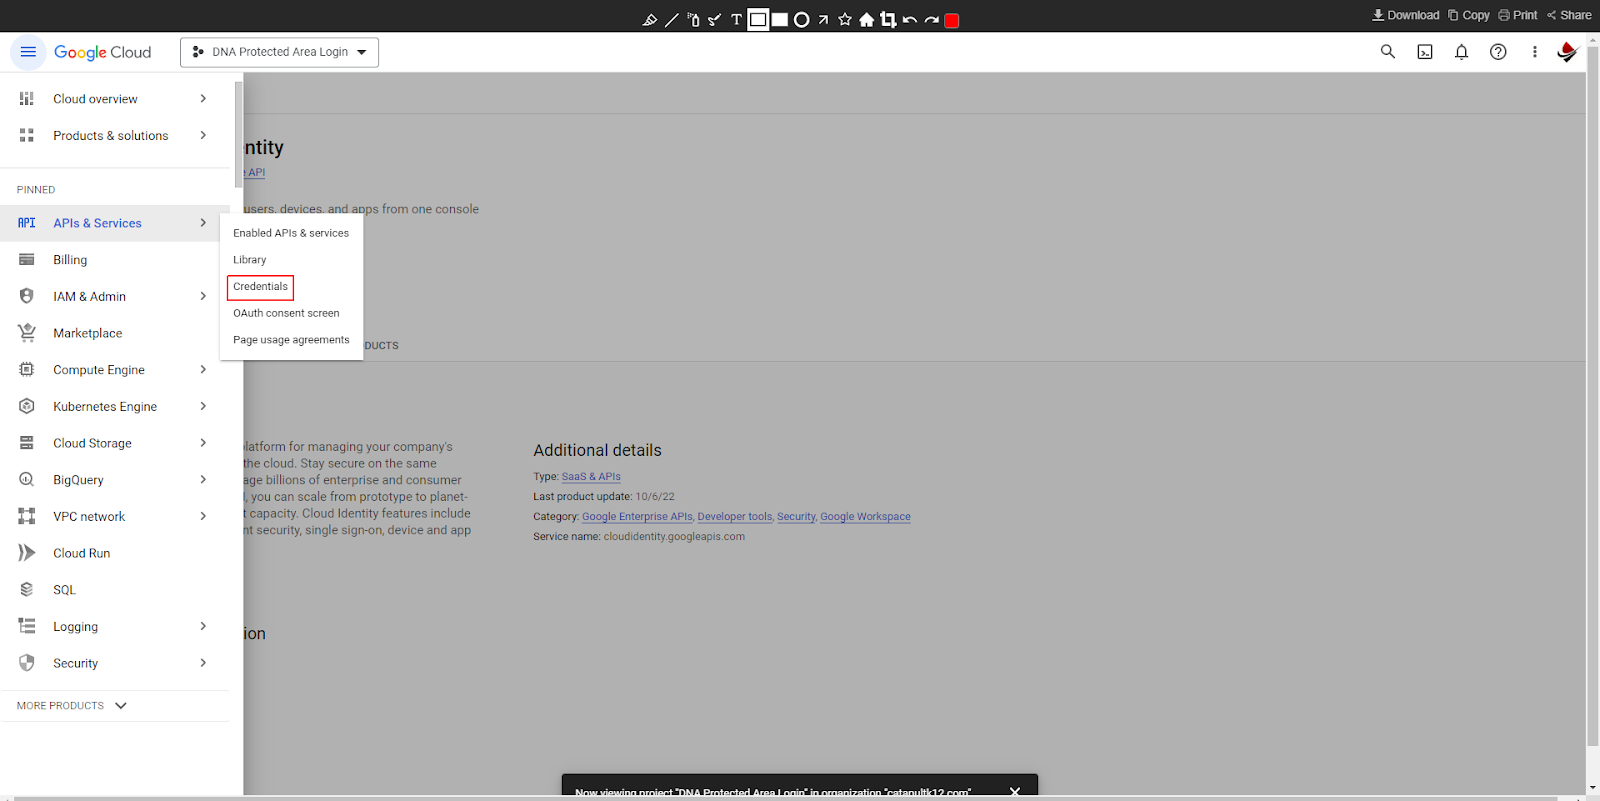
Step 3: Generate an API Key
- Go to "APIs & Services" > "Credentials."
- Click "Create credentials" and select "API key."
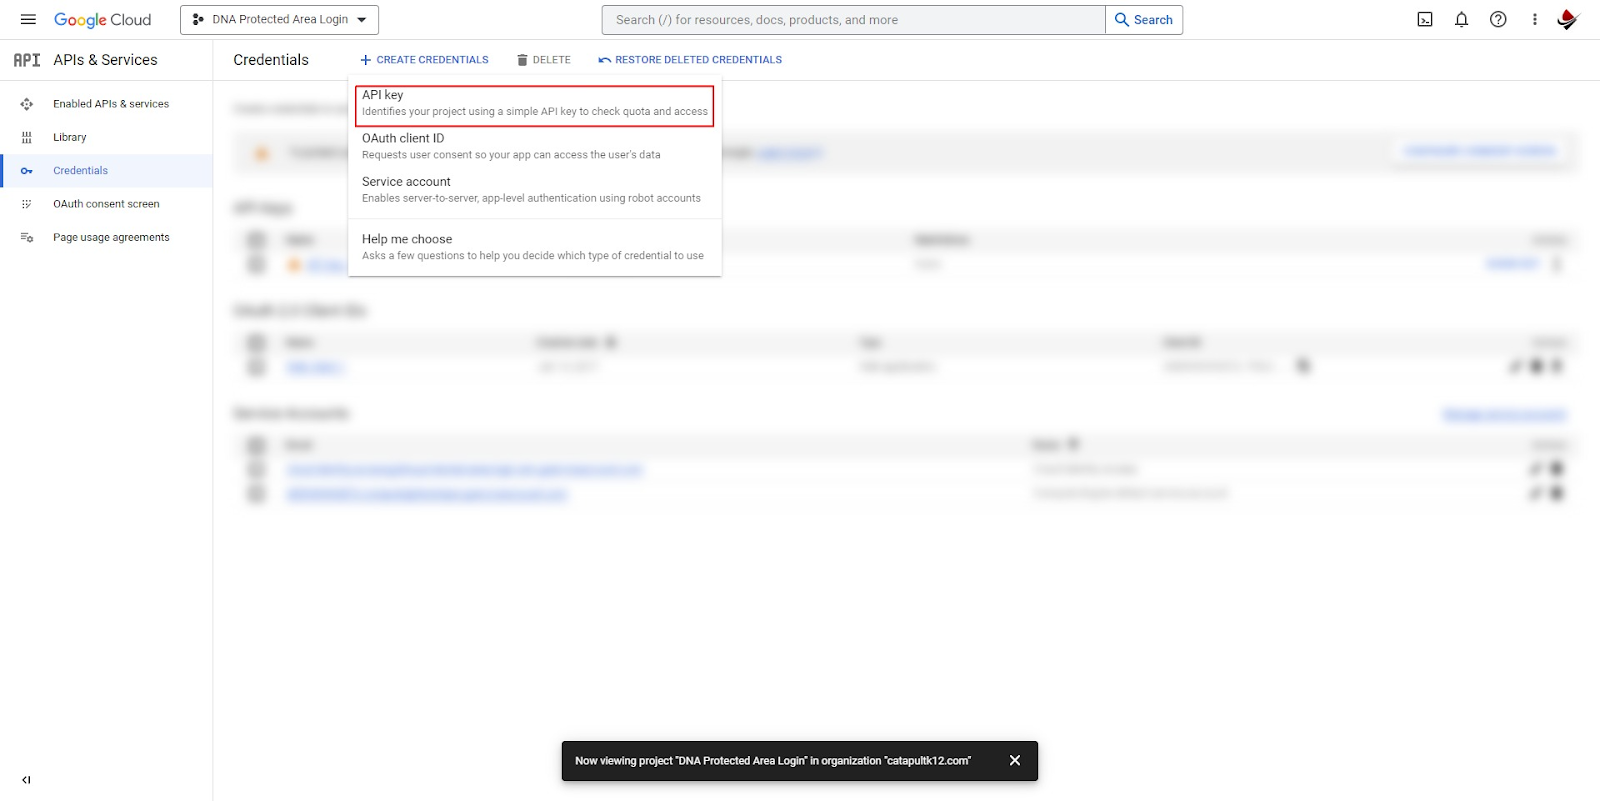
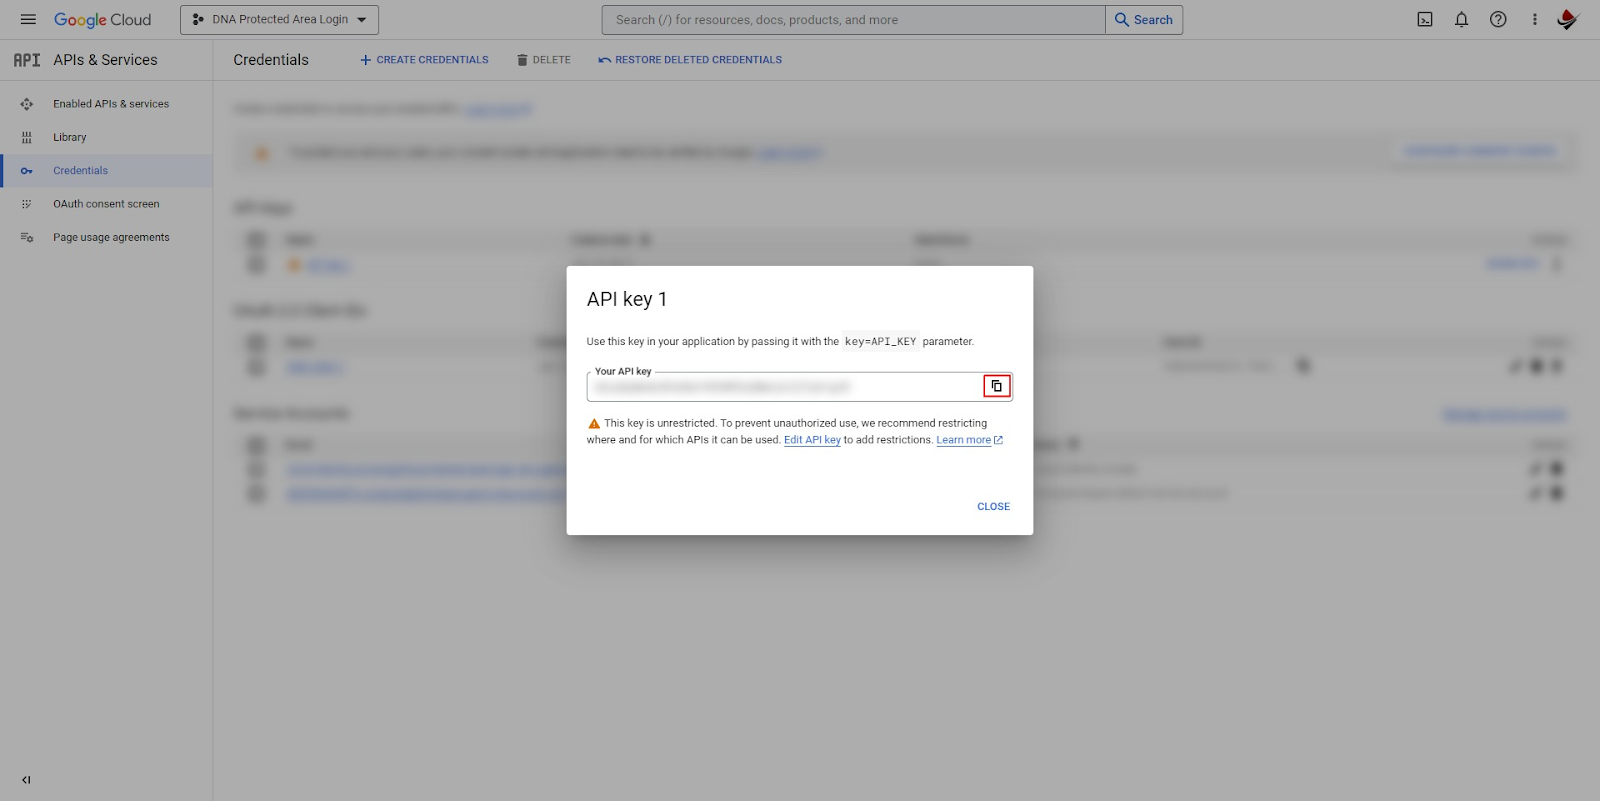
- Copy the generated API key. Be sure to keep it safe; it's essentially a password for your project!
Step 4: Set Up a Service Account and Enable Domain-Wide Delegation
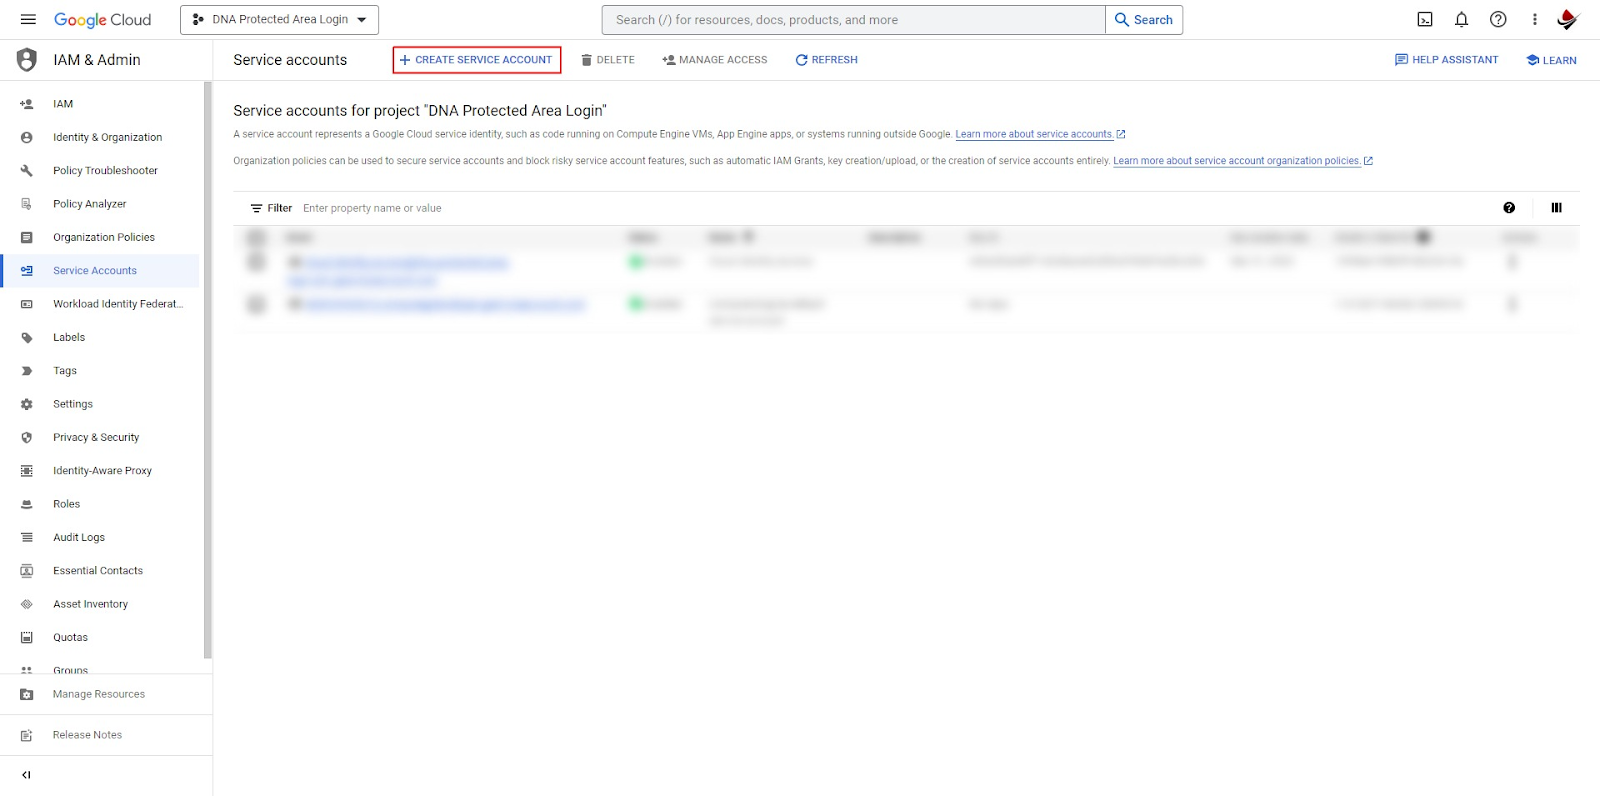
- In the Google Cloud Console, go to "IAM & Admin" > "Service accounts."
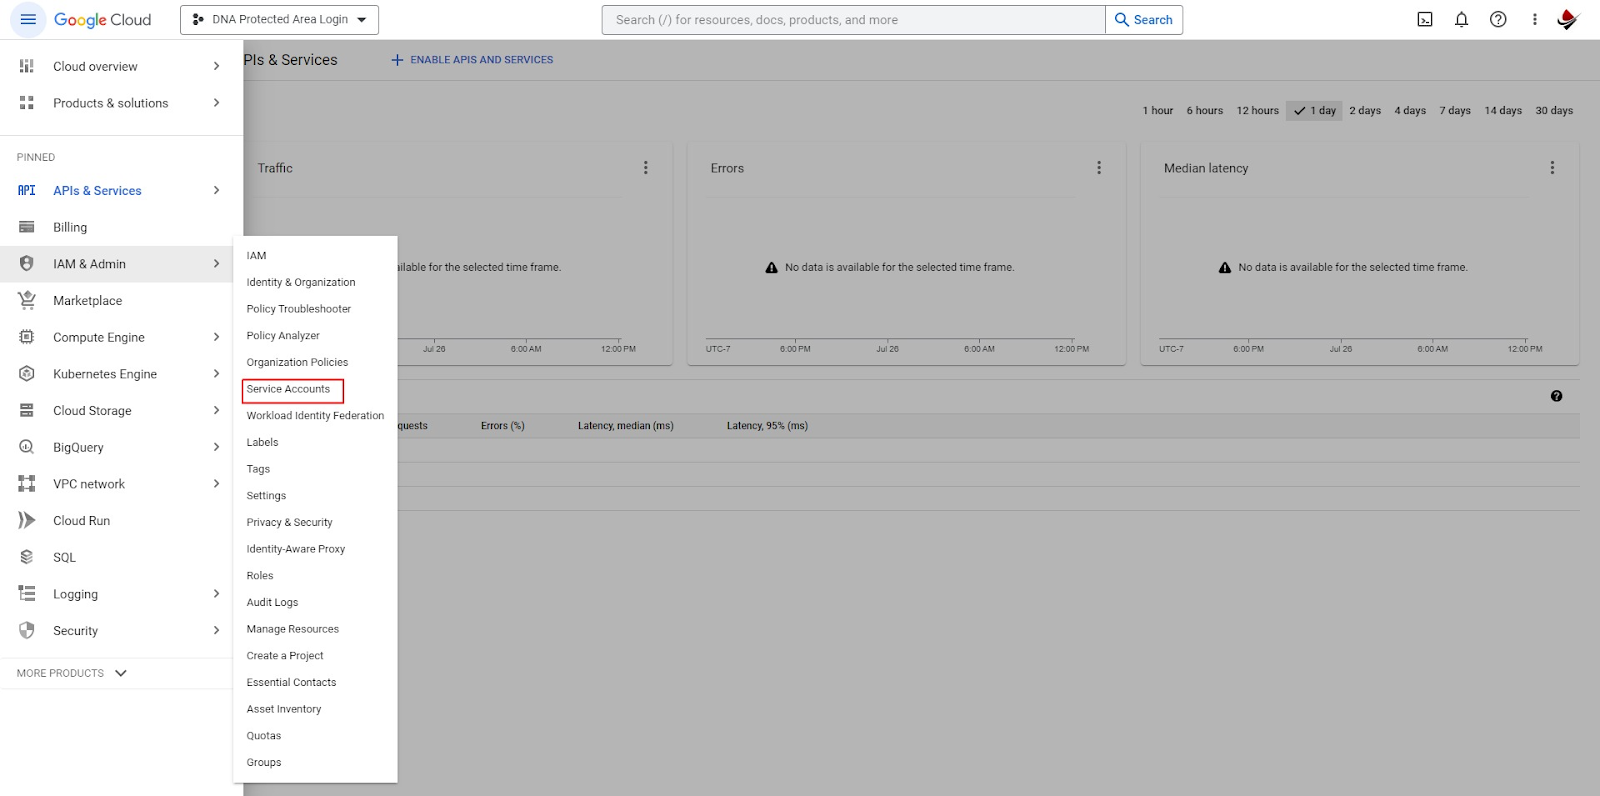
- Click "Create Service Account."
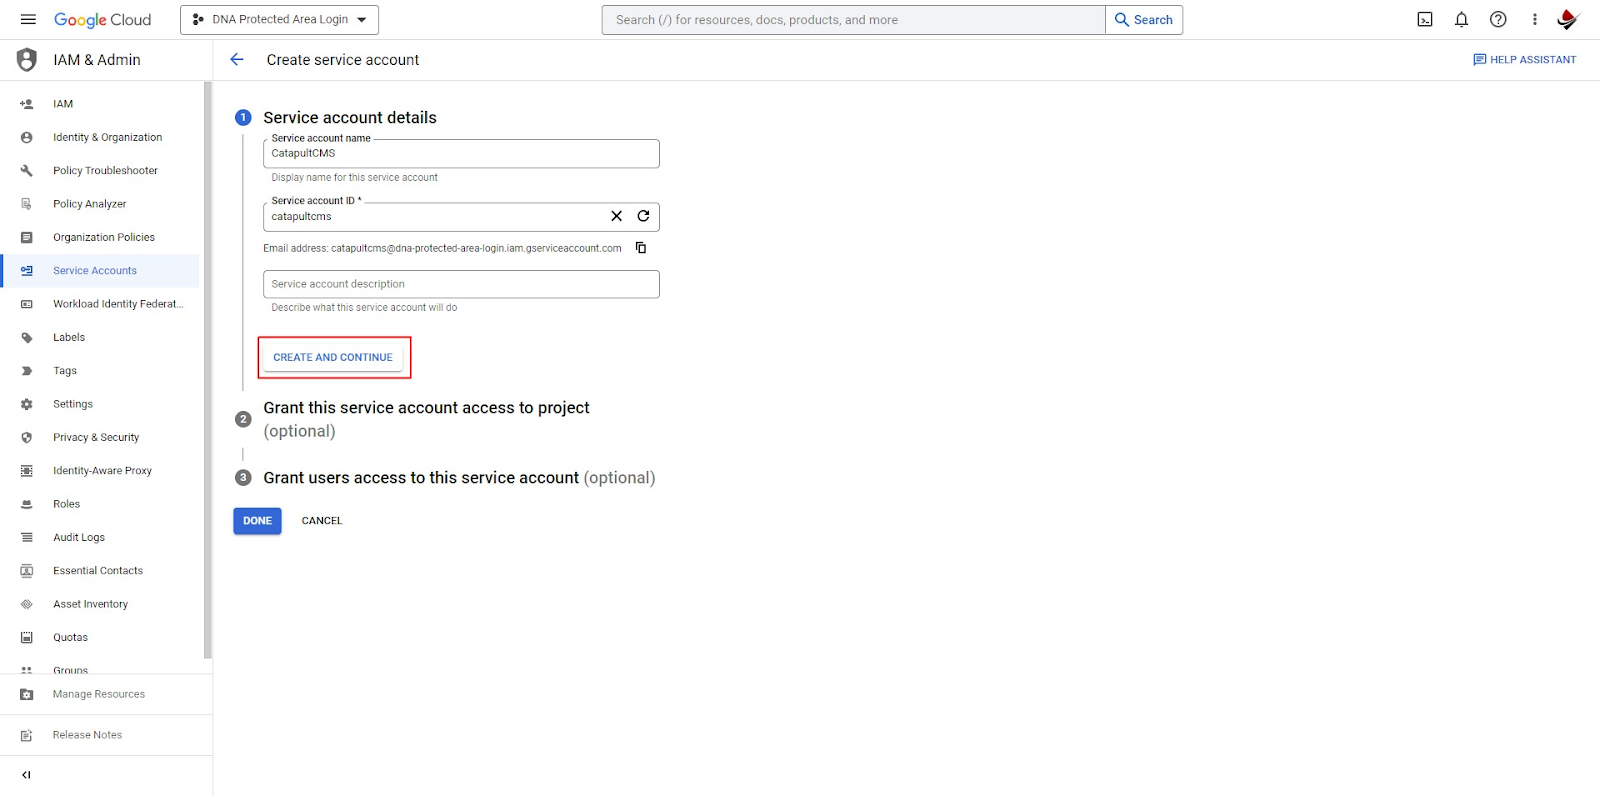
- Give it a name, like "Catapult CMS Service Account," and a description.
- Click "Create."
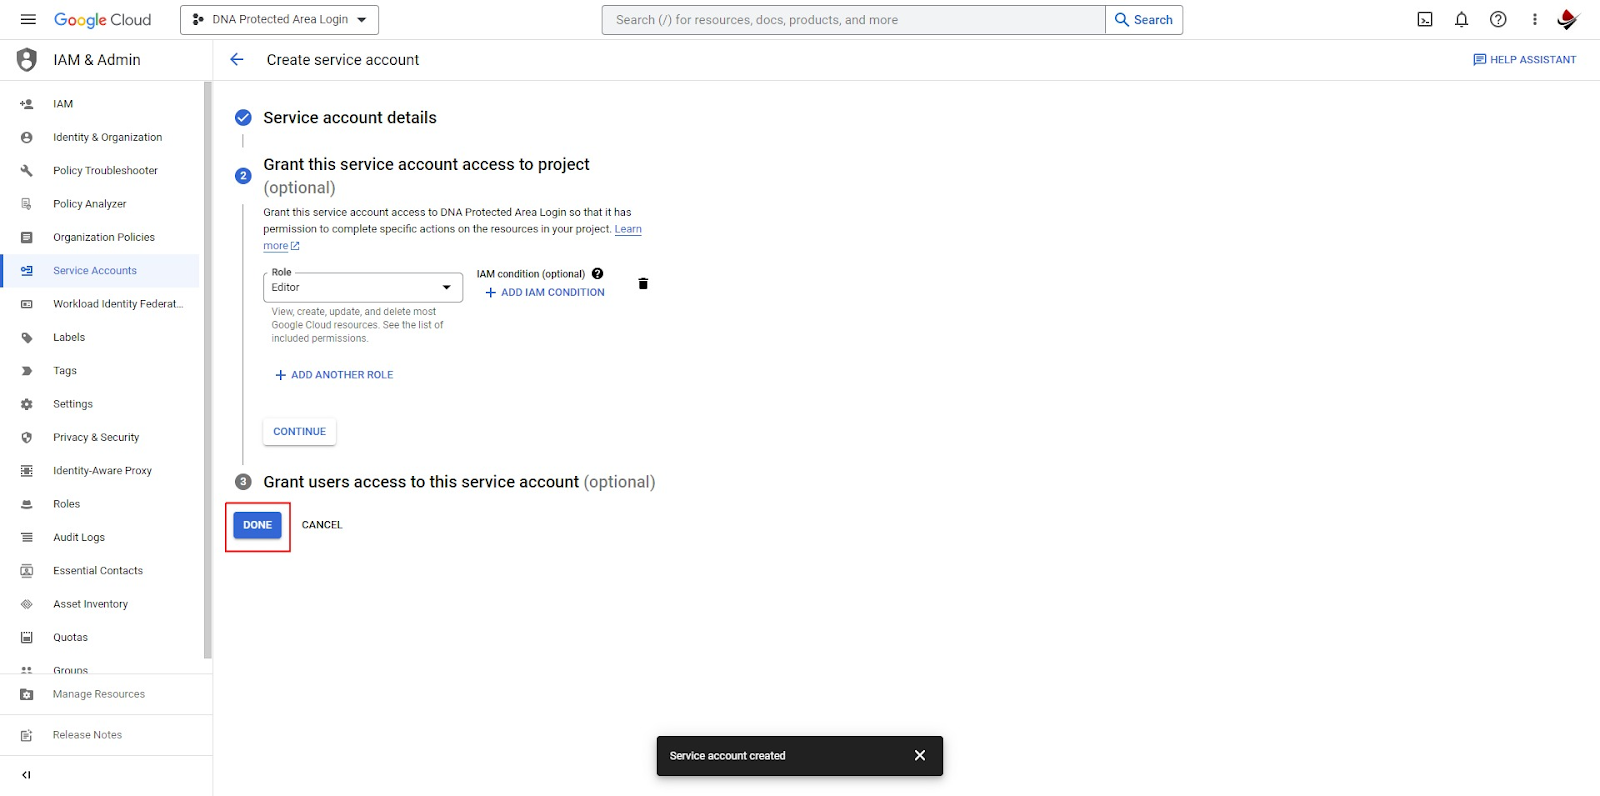
- On the "Grant this service account access to project" screen, select the necessary roles.
- Click "Done."
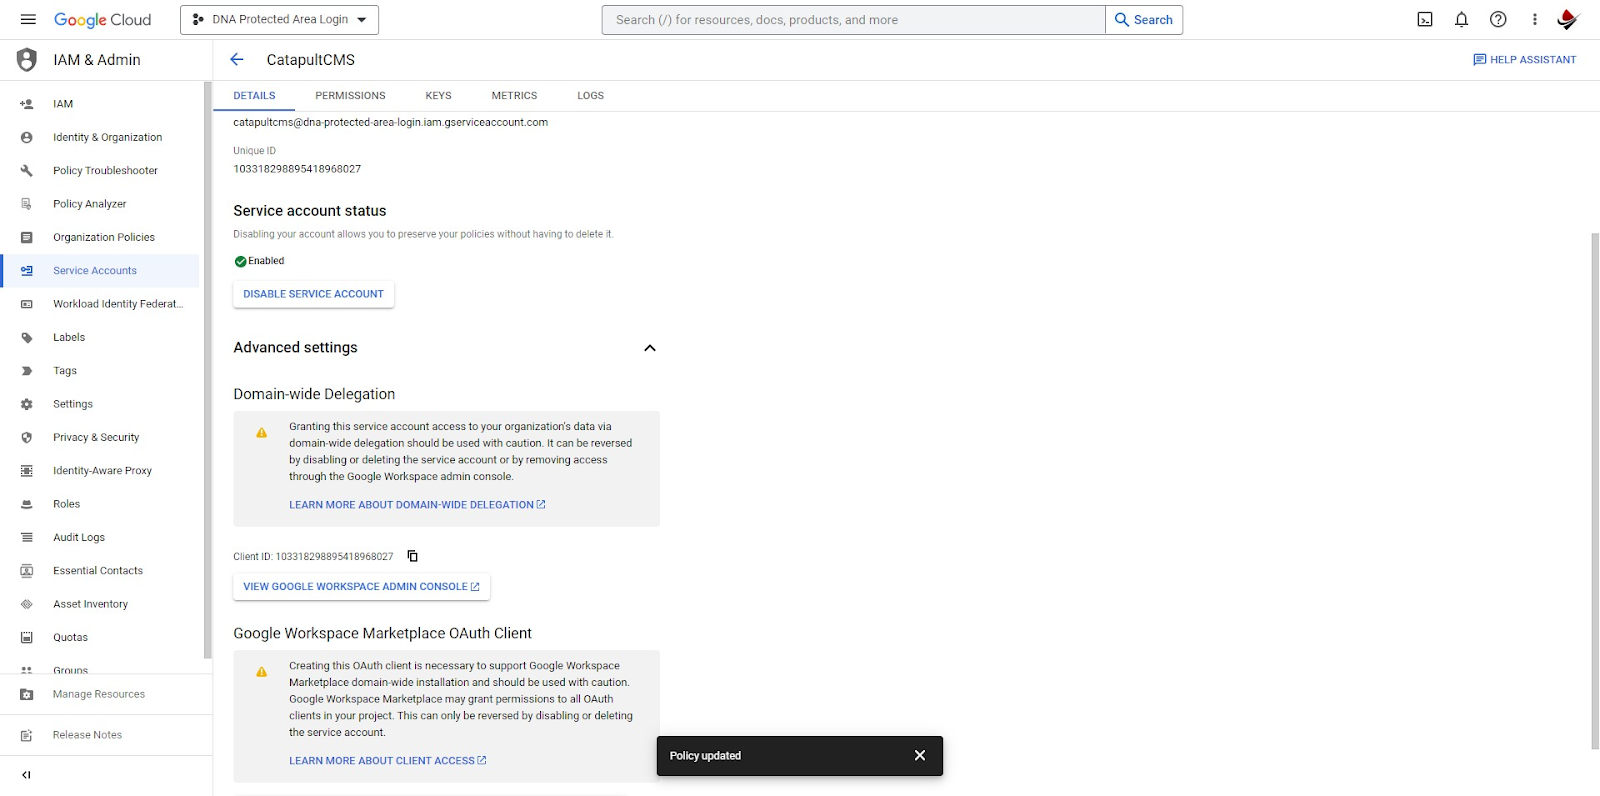
- Click on "Edit" for your newly created service account.
- Scroll down to the "Show domain-wide delegation" option and select "Enable G Suite Domain-wide Delegation." This is hidden by default, you will need to open the advanced section to see this option. Once open it will provide a link to take you to your Google Admin Panel, where domain delegation can be setup. Note that you should copy the ID of your service account before leaving this page.
The relevant settings are under: Security > Access and Data Control > API Controls

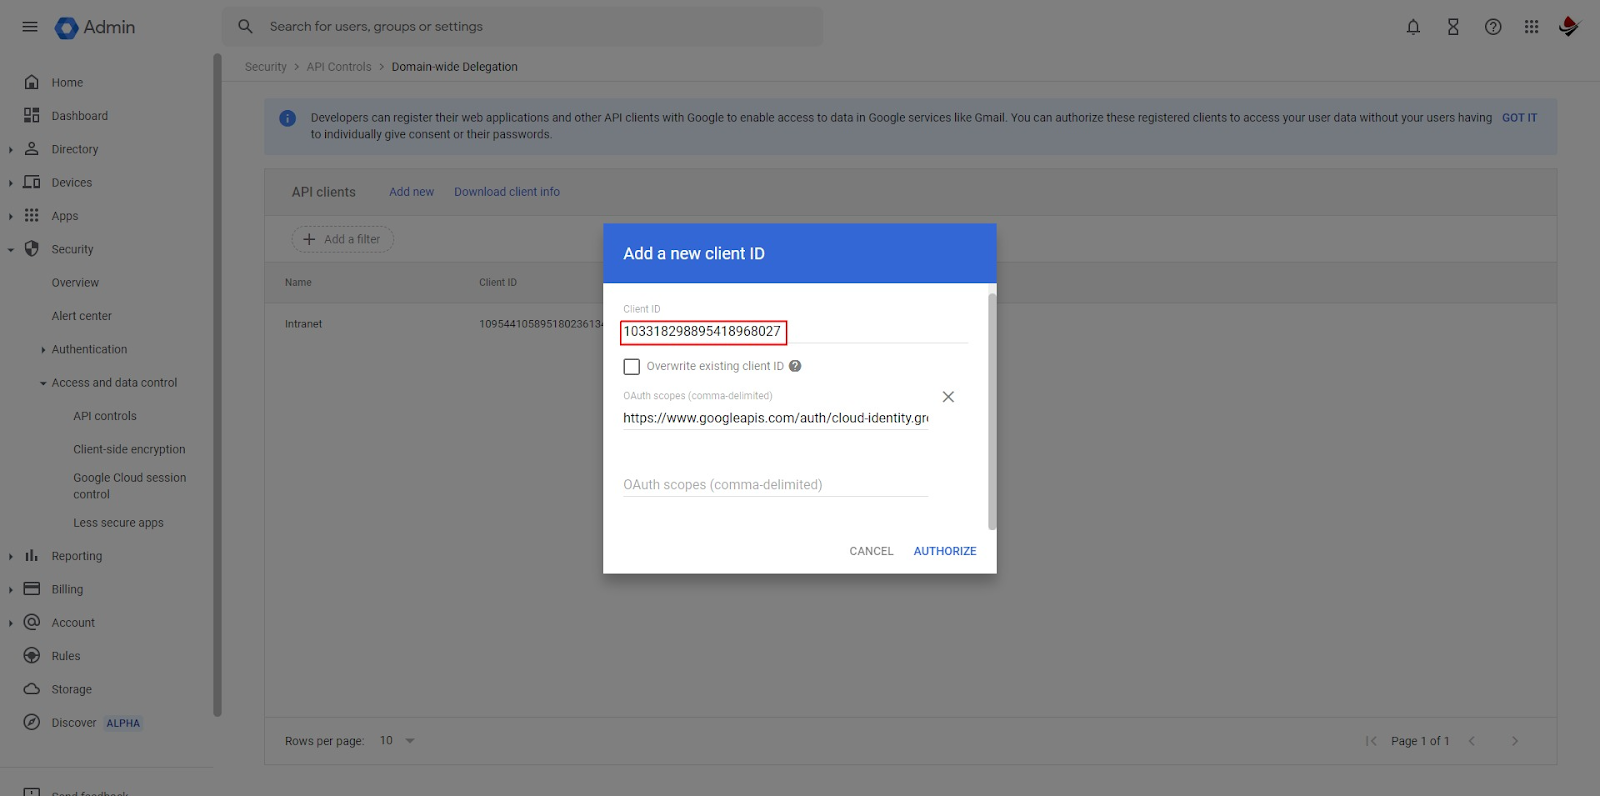
This ID must be replaced with the ID of the service account you created.
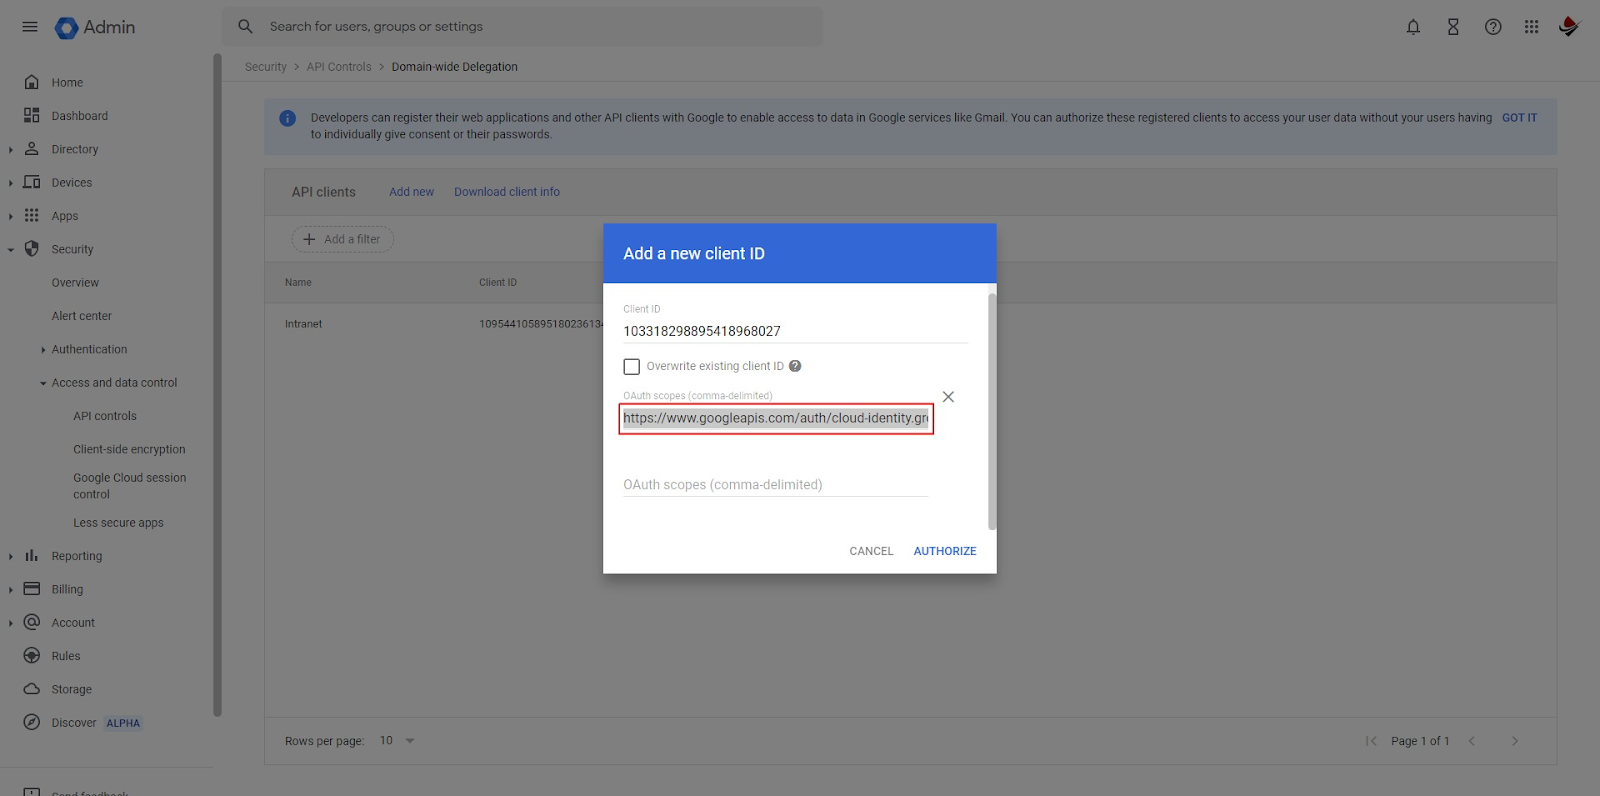
The OAuth Scope should be set to: https://www.googleapis.com/auth/cloud-identity.groups.readonly
- Enter a product name for the consent screen, e.g., "Catapult K12 Integration."
- Click "Save."
Step 6: Grant Catapult K12 Access to the Service Account
- Still in the "Service accounts" section, click on the name of the service account you created.
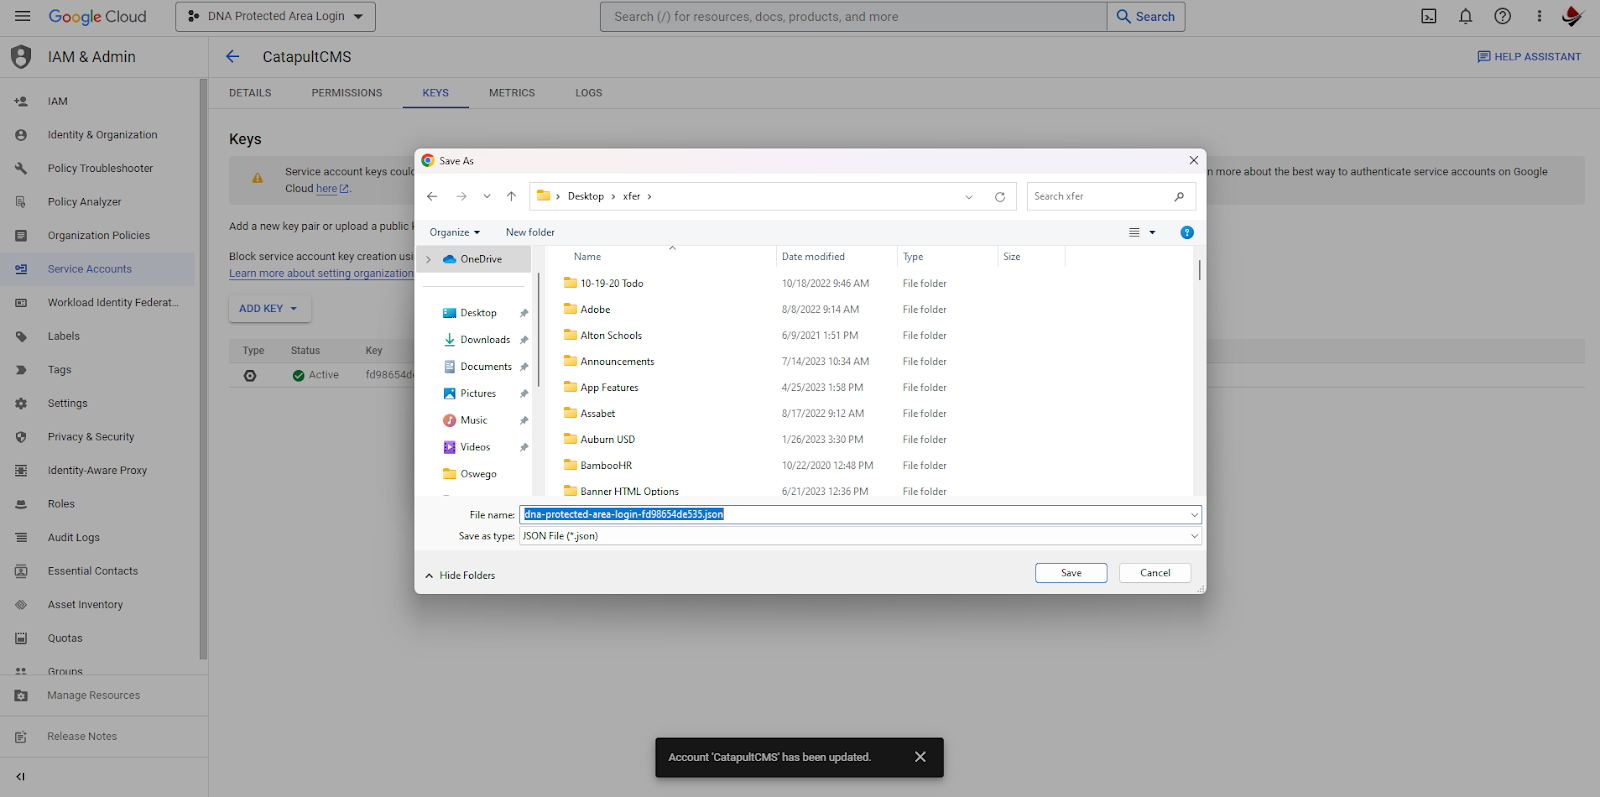
- Under "Keys," click "Add Key" and select "JSON."
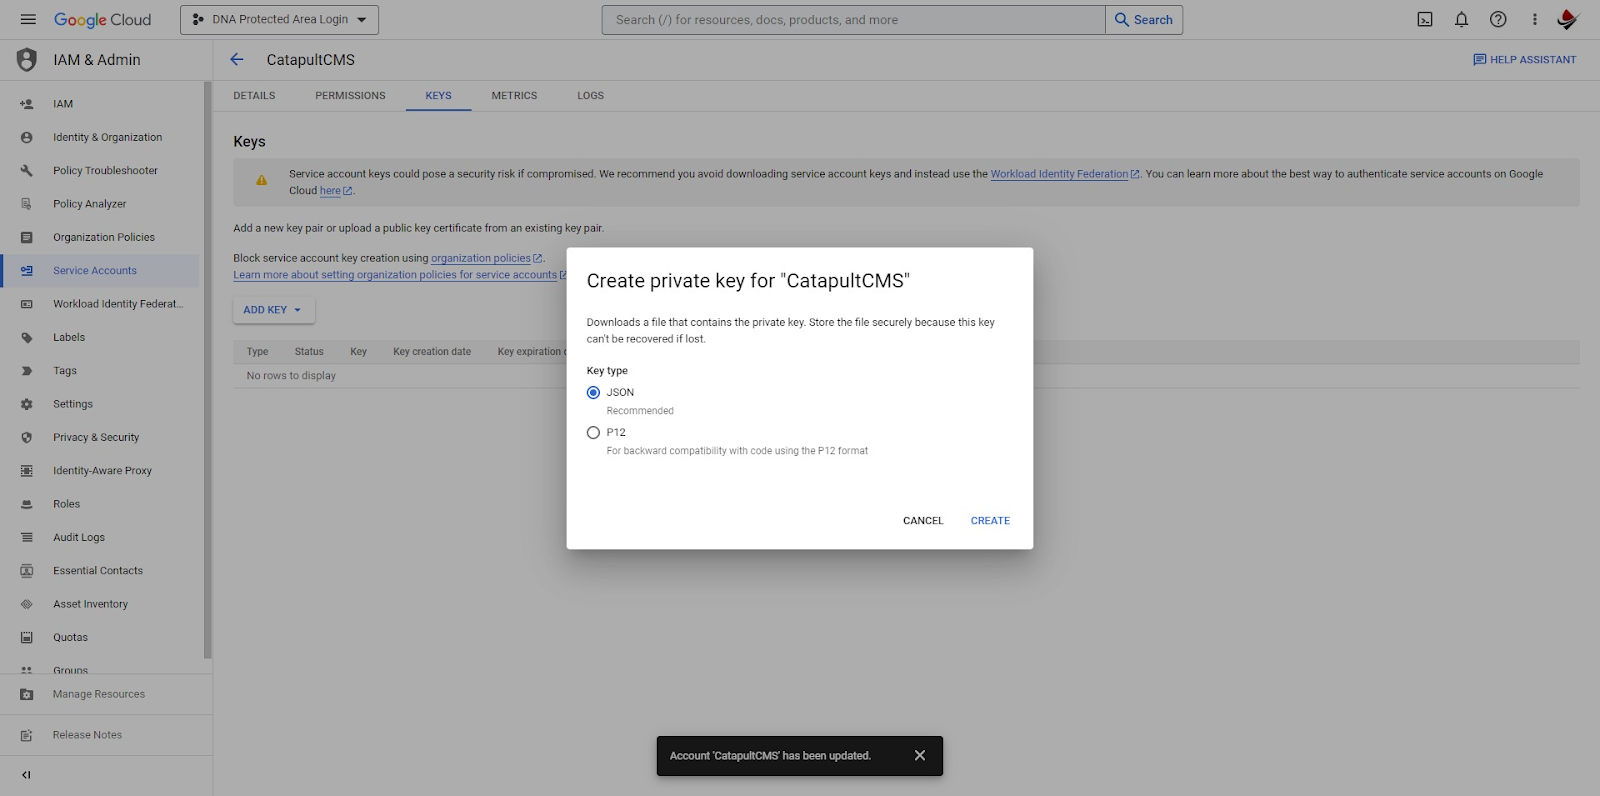
- The key will automatically download. Save it in a secure place.
- Note, access to this key can be used to download ALL staff and student information found in your google admin panel, it’s very important that it’s never publicly visible.
To set up Google Group restrictions for your secure site access, we’ll need to know which google user will be configuring access, this “Super Admin” will have access to the system administration portion of the secure website interface, so you'll need to provide us with an administrative user for the back-end UI of the protected area login. (if you’ve gotten this far this has probably already been setup for you)
- Login to Catapult Secure Website interface and assign credentials for the service account.
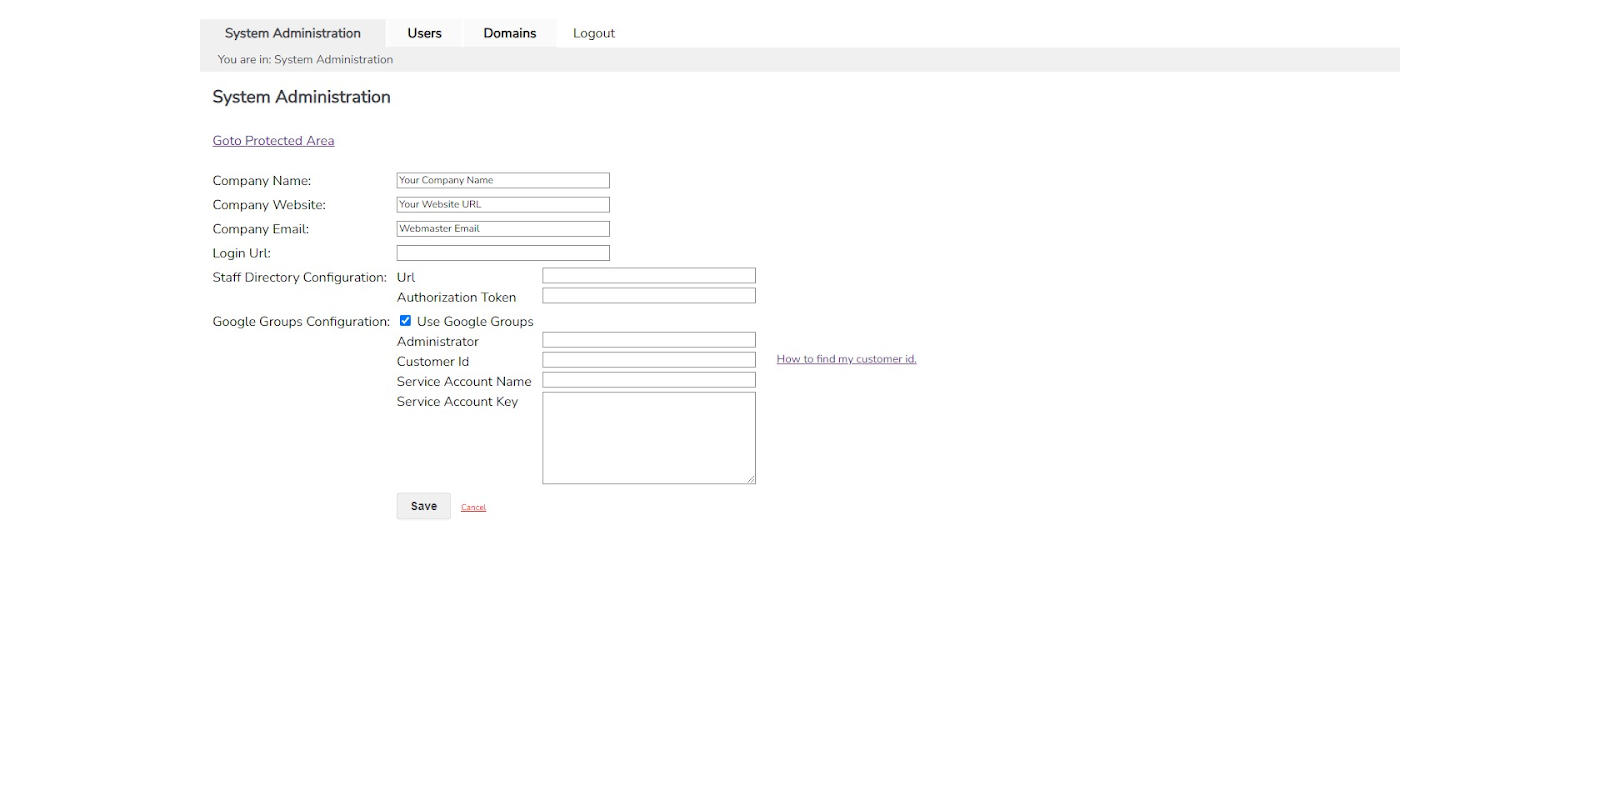
- To Enable Editing hit Edit, Fill out fields as follows.
Administrator: The google email address of the administrator who manages this domain (your email)
Customer ID: The google ID of your organization, a link to help you find this ID is provided. Note that this is different from the service account ID used to access settings, one is a user, the other is an organization (we need the ID of your school district)
Service Account Name: The service account created to give access to google groups, example: 480949494872-compute@developer.gserviceaccount.com
The last field Service Account Key needs the content of the JSON file which was downloaded above.
Once groups have been configured a new tab will appear in the admin interface, this tab will allow you to configure which google groups a member must belong to to be able to get into your password protected website
Step 7: Configure Google Group Restrictions in Catapult’s Secure Website Admin Interface.
- Navigate to the "System Administration" section in our secure website platform. This can only be accessed by the system administrator, other users will bypass this and proceed to the secure website.
- Open the "Google Group" tab and click "Add Group."
- In the "Add Group" form, select the Google Groups that should have access to your site. These groups should already be available in a dropdown select list, based on the access granted to the Cloud Identity API..
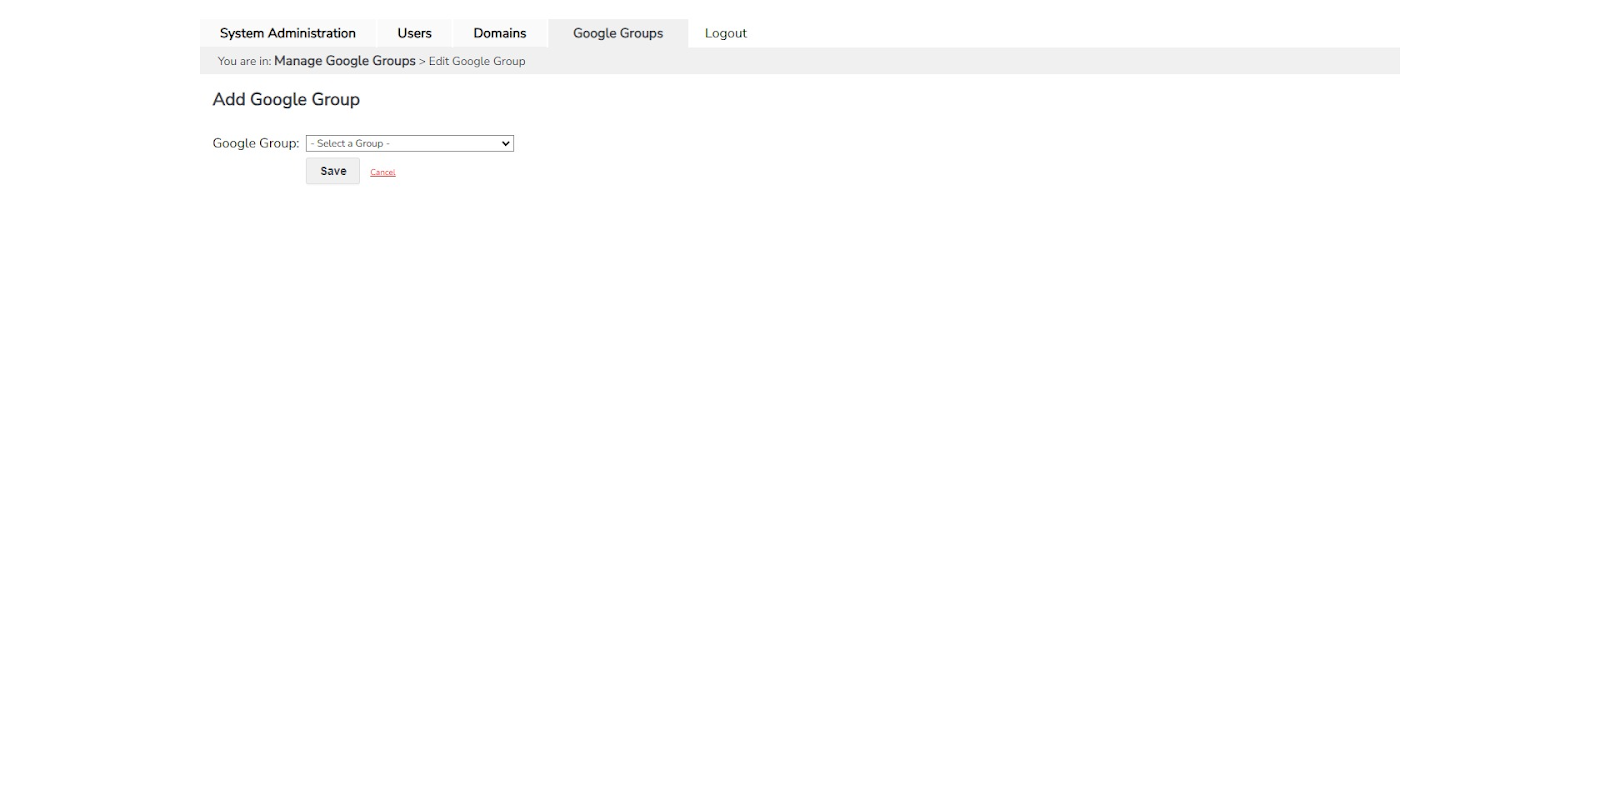
Note: Groups that have already been added to the group table will be excluded from this dropdown list.
---
Congratulations, you've successfully set up secure website authentication using Google Groups with Catapult K12!
For any further assistance or questions, please feel free to contact our support team.