In CONNECT, any user can add additional contacts beyond the normal contacts included from your student information system. Learn how to share and manage your custom lists.
To see who is included from your Student Information System, see Introduction (SIS Configuration).
Manage and share custom lists
- From your dashboard, choose Manage Custom Lists
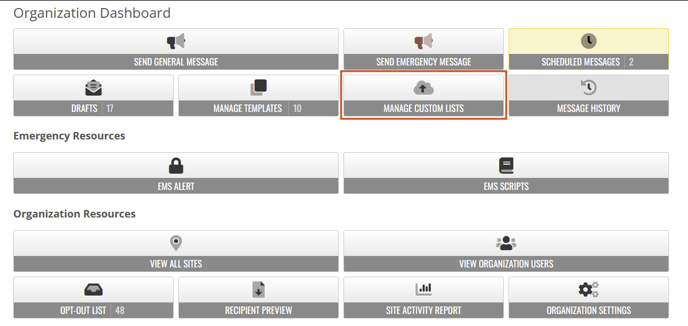
-
Review the custom lists available. You can see any custom lists you added in the past. If other people have shared custom lists with you, you can see them here too.
New lists
- From Manage Custom Lists, choose New List
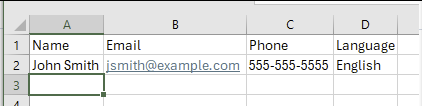
- Choose Download CSV Template
- Edit the file in Excel.
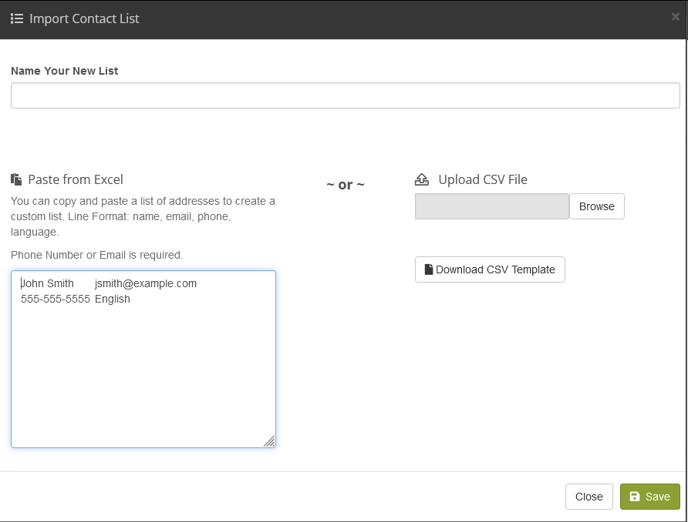
- Back on the web page, either upload the CSV file using Browse, or copy and paste the data into the "Paste from Excel" section.
- Avoid including columns other than Name, Email, Phone, and Language.
- CatapultCONNECT automatically detects the columns. Additional columns of data can cause CatapultCONNECT to misidentify the columns.
- Technical note: CatapultCONNECT accepts both tab-separated and comma-separated columns.
- Fill in a name for your new list at the top.
- Choose Save
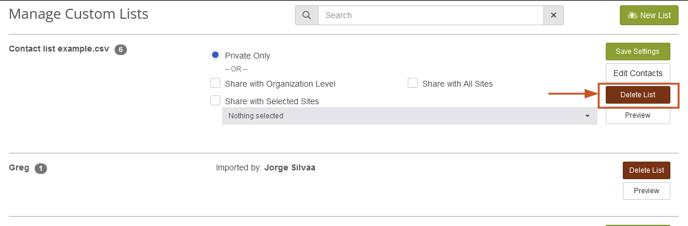
Share your custom lists with others
You can share your custom lists with everyone at a site. If you work at the organization level, you can share with an entire organization. If you decide to no longer share, choose Private only.
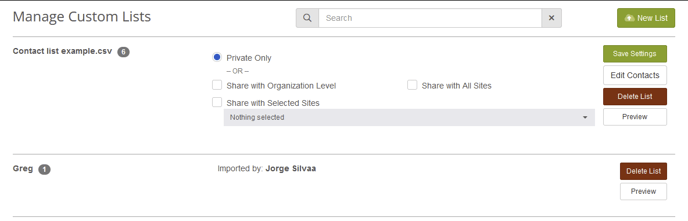
- Private Only: not shared with anyone.
- Share with District Level: shared with Organization Communication Team. Site-level access do not see this option.
- Share with Selected Sites: shared with selected site communication teams of your choice. Option visible to Organization Communication Teams only.
- Share with All Sites: shared with all site communication teams. Option visible to Organization Communication Teams only.
- Share with Site: shared with your Site Communication Team. Staff-access levels do not see this option.
Delete custom lists
If you want to remove an old or shared custom import, choose the checkbox to the left of the list and then choose Delete List.
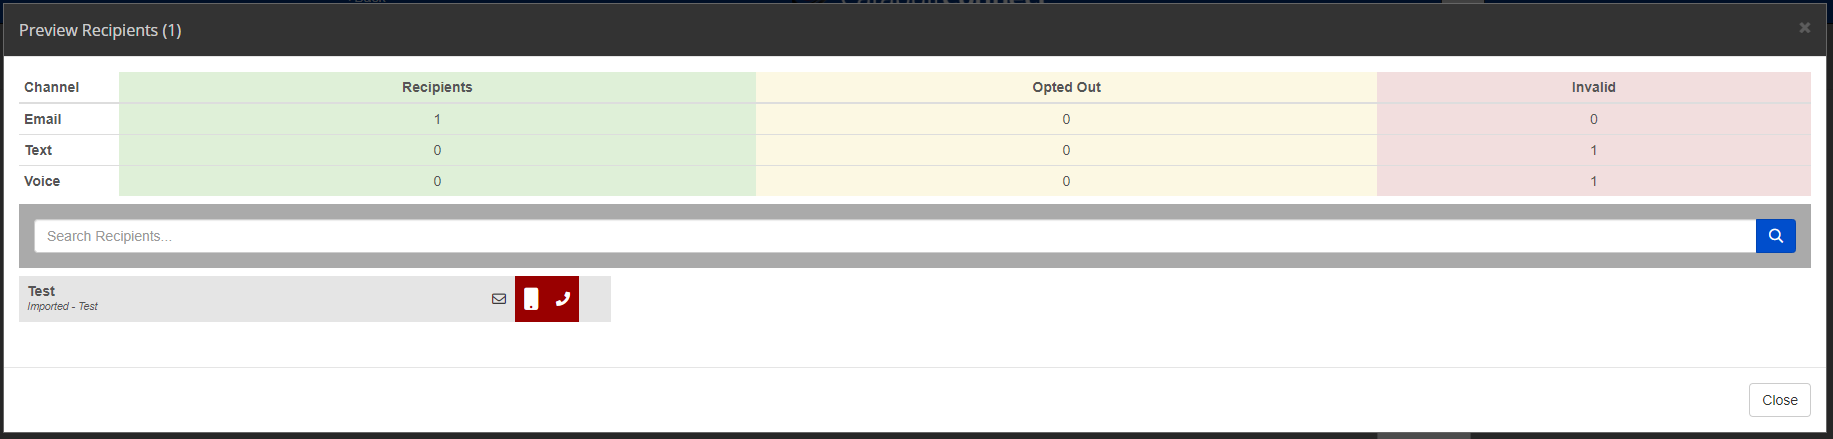
Preview custom list
You can see the recipients of custom imports by selecting the Preview button.

NOTE - Variables are not supported for custom imported lists