This article highlights how to integrate, access, and manage your Google calendars so that your website can have the most accurate and easily accessible information.
Instructional Video
Place Your Calendar Element
- The first step is to choose the website page where you want to place your calendar or multiple calendars.
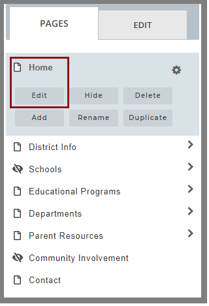
- On the PAGES panel, click on your chosen page, then click on the EDIT button to view the EDIT PANEL.
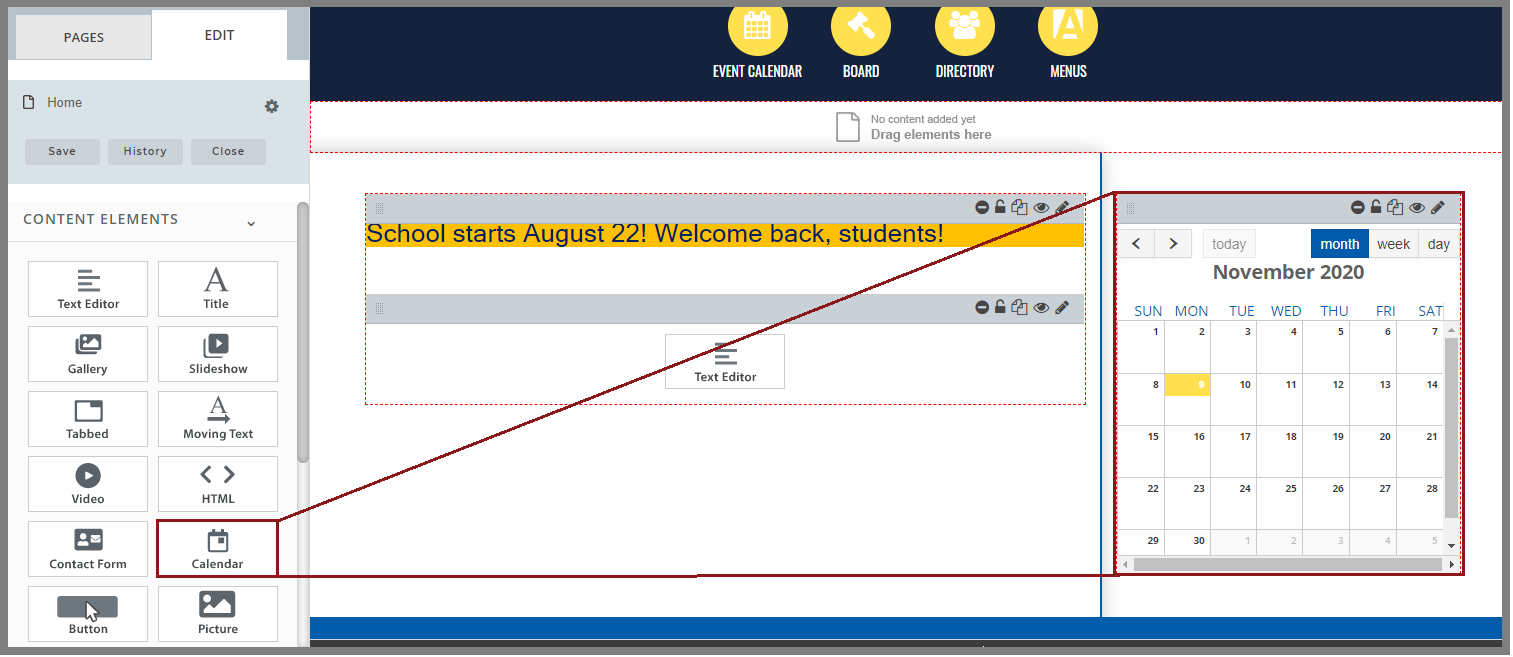
- On the EDIT PANEL, select the CALENDAR icon and drag it over into one of the red outlined content regions on the page.
Sync Your Google Account
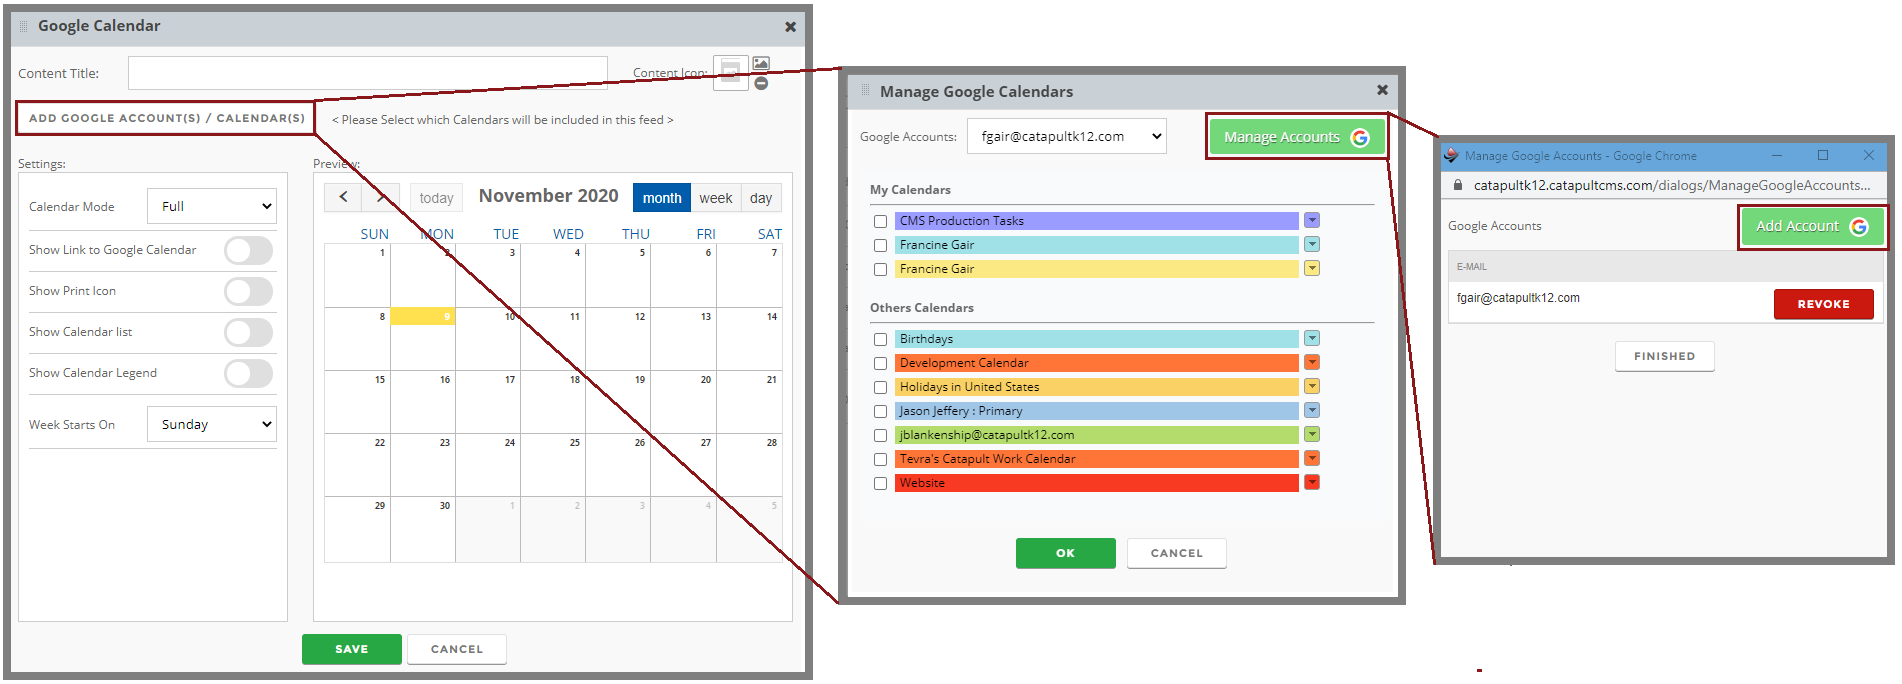
- Click either the pencil icon in the top right corner of your calendar template or anywhere within the calendar space, and a window will pop up with options for displaying your calendar.
- Click on ADD GOOGLE ACCOUNT(S)/CALENDAR(S).
- A second window will pop up where you will click a green MANAGE ACCOUNTS button in the top right corner.
- In the next popup window, click the green ADD ACCOUNT button.
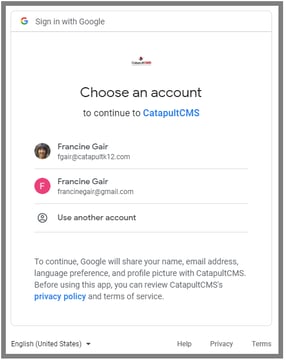
- A SIGN IN WITH GOOGLE window will open, where you will log in to the Google account associated with the calendar you are adding to your website.
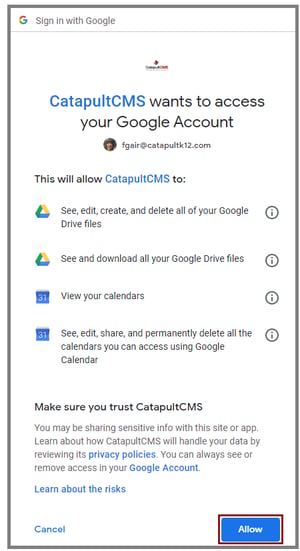
- A new window will open, saying CatapultCMS wants to Access your Google Account. Make sure you click ALLOW at the bottom of the screen, so your Google account can fully integrate with your website(s).
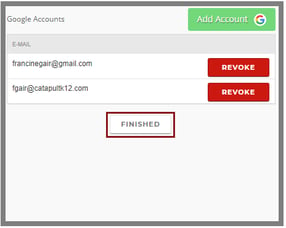
- A new GOOGLE ACCOUNTS window will pop up, showing the Google accounts you have chosen.
- Click FINISHED to finalize the synching.
Display Your Calendar
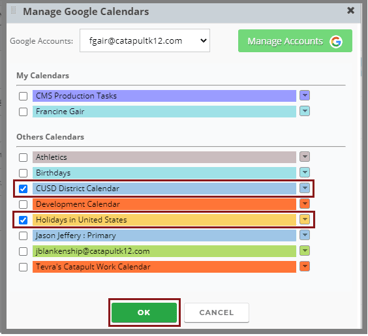
Choose which calendars to display.
- In the MANAGE GOOGLE CALENDARS window that is still open, you will see two sections:
-
- MY CALENDARS and
- OTHER CALENDARS (if you have any subscriptions or access to calendars that aren’t specifically yours)
-
- Check the box next to each calendar you want to display, and click OK.
Decide how you would like your calendar to be displayed on the page.
In the GOOGLE CALENDAR window that is still open, make your display choices:
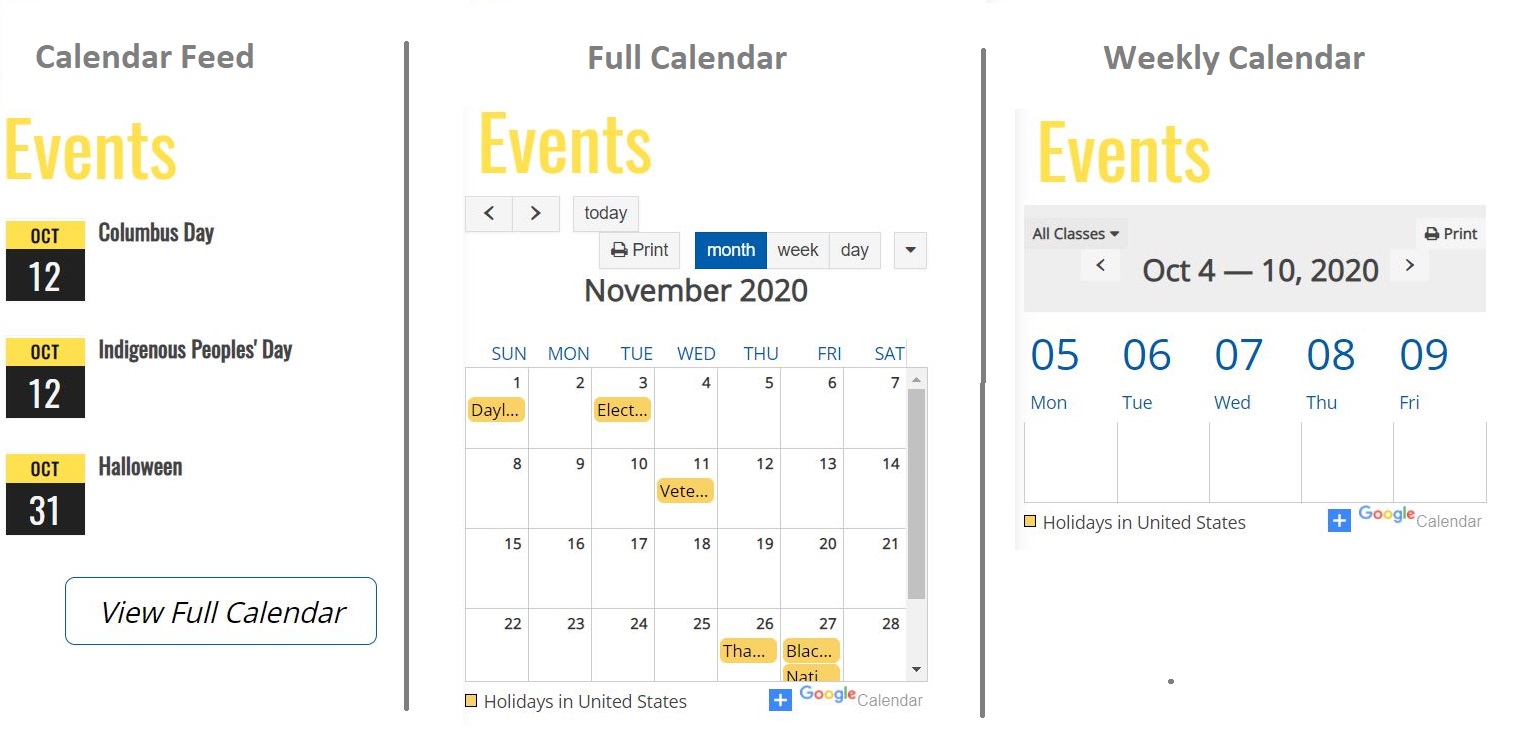
- Calendar Mode: Choose Full, Event Feed or Week. Usually the Calendar Feed is displayed on the Home page with a link to the full calendar on the Calendar page.
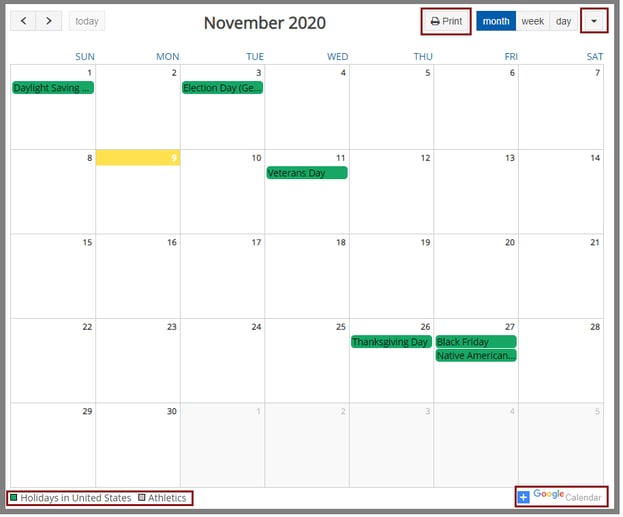
- Show link to Google Calendar – a Google Calendar icon and link
 will be displayed below your calendar.
 - Show Print Icon – a Print button
 will display above your calendar.
 - Show Calendar List – a dropdown list of calendars will be available at top right of your calendar:
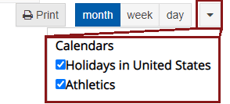
- Show Calendar Legend – a color-coded legend
 will display below your calendar.
Here is a sample full Google calendar with all options displayed:
Change Your Calendar Color
You may choose the color you want for your calendar – perhaps one of your school or team colors. If you display more than one calendar on one integrated calendar, you will want to choose colors that display well together.
- Click on your calendar to open the GOOGLE CALENDAR window.
- Click MANAGE CALENDARS to open the MANAGE GOOGLE CALENDARS window.
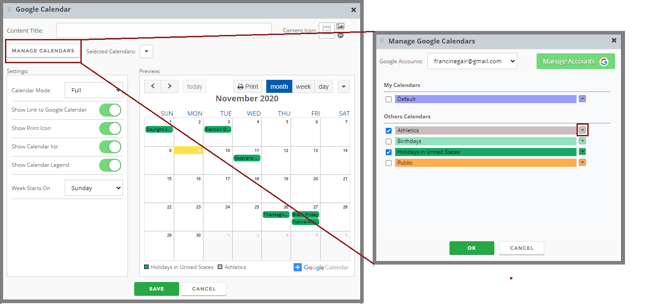
- Click the arrow at the right end of the color bar for the calendar whose color you want to change.
- A COLOR CHOOSER window will open. Click the new color you want – it will appear in the larger box above with a color number. (Note: There are 3 ways to choose your color – Web, RGB and HSB. You can play with these different ways to find the color you want.)
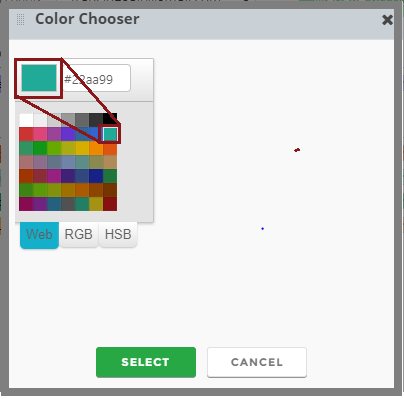
- Click SELECT and your calendar will now be displayed in the color you chose.
Make Your Calendar Public
- Go to calendar.google.com and hover over the name of the calendar you are adding to your website. Click the three dots
 that appear.
 - In the popup window, click SETTINGS AND SHARING.
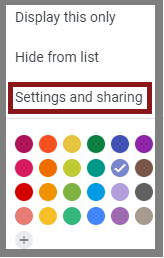
- Scroll down to ACCESS PERMISSIONS, then:
-
- Check the MAKE AVAILABLE TO PUBLIC checkbox.
- In the dropdown menu, select SEE ALL EVENT DETAILS.
-
This ensures that anyone viewing your website has full permission to view your Google calendars, as well as the events within each one.
- Click SAVE to finalize your selections.
Follow these steps for each of the calendars you have synced to your website.
