This article explains the purpose of alerts and how to create your own.
Alert Function Permissions
-
If you have access to the Alerts function, you’ll see an ALERTS button at top right of your Catapult Dashboard.
Access to the Alerts function is granted by clicking the USERS button and adding the Alerts permission to a user. For more information, please view our User Groups & User Management video.
Creating an Alert
-
After you click the ALERTS tab, a MANAGE ALERTS PAGE opens.
-
Click on LOAD ALERTS to the right of the website name, then on the green NEW ALERT button. Here, you will be given 5 alert types to choose from: Default, Info, Success, Warning, and Emergency.
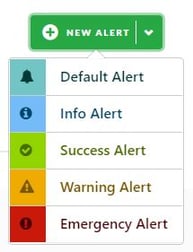
Each alert type has a different color and icon, but the Default Alert allows allows you to change the bell icon to a photo or YouTube video.
- After you select an alert type, you can still go back and change it by using the dropdown menu in the top right corner next to the TITLE text box.
-
Fill in the TITLE and CONTENT text boxes
-
Decide if you want the post to be scheduled or saved as a draft
-
Add documents, and
-
Choose which sites you would like the alert to be sent to.
Once your alert is finished, click on the green SAVE ALERT. This will take you to your queue where you can see and manage all your alerts.
- Choose which school websites display the alert
- Allow school administrations to create alerts for their school only
- Display multiple alerts on your websites - DISMISS link moves on to next alert
- Change the image on the Default alert
That’s it! All your active alerts will then show up on the homepage of your selected sites.
Instructional Video
Happy Editing!